Friday, November 18, 2011

Foodie Find - Double Chocolate Mousse Torte

Following my making of the pretzel bites from Mel's Kitchen Cafe, I did some more browsing around her blog. While I was doing this, I stumbled upon Mel's recipe for a double chocolate mousse torte!

My goodness this looks amazing!!! I whipped up a batch of chocolate mousse not too long ago and let me tell you, I will use that recipe to make this scrumptious cake sometime soon!
Photo Credit: Mel's Kitchen Cafe
Thank you Mel for posting such deliciousness! I can't wait to make this and report back on how it turns out!

Happy Friday!

t

Wednesday, November 16, 2011

Homemade Pretzel Bites

It was in fact a happy Saturday to meeeeee this past weekend! My darling Jen stayed over on Friday night and on Saturday morning I woke up and wanted nothing more than to make some homemade pretzel bites. Who knows why I get these strange cravings but once they hit, they don't disappear!

So I took a little browse through my bookmarked recipes (my goodness, there are A LOT of recipes. It may be time to start printing them off!) and I managed to find a few recipes. Originally, I was going to use one that looked good but it required the pretzel bites to be both boiled and then baked. Frankly, it seemed a little complicated for bites of pretzel dough. Then I came across a second recipe that I'd bookmarked and I knew I'd found the right one.

This recipe was from Mel's Kitchen Cafe and the recipe was so straightforward and easy that you can't help but want to make these delicious bites of the Gods on a daily basis! The pretzels come out with a crisp crust but are so supple in the middle that  you can't help but feel that you've died and gone to pretzel heaven.

The process is quite simple:

Toss all ingredients in the bowl of your mixer fitted with the dough hook. After about 5 minutes of mixing you will have a lovely smooth dough that needs to do a bit of relaxing. I put mine in a bowl greased with olive oil and let it rest for an hour. It rose quite a bit when the hour was up and I proceeded to turn the dough out on to my trusty granite slab that I greased slightly. 
I LOVE DOUGH!
The dough is then divided into 4 pieces and rolled into logs (I love my new dough cutter)
Each log is then cut into 6-8 pieces. Next time I make this, I will make each log cut 12-14 pieces because these were HUGE!
Little bites resting before going in the oven. They have been dipped in a water/baking soda mix & then sprinkled with salt
Lovely pink Himalayan sea salt. Do not be afraid of the 500F temperature that you'll have to set your oven to.
Look at what popped out of the oven!
A close-up!
I served them with a spicy tomato sauce! Look at all of the layers inside the dough!
All in all, I will be making these again and soon at that! I'm thinking they will be making an appearance at our family's Christmas party in a month's time. Like I said, I will probably make them smaller because they do grow even more when they're resting prior to baking.

I hope you all are having a great week thus far!

Keep smiling and happy baking!

Tamara

Monday, November 14, 2011

Delicious Food Show 2011

Macarons - I'm coming for youuuuuuuu!
A few weeks back I had the privilege of attending the Delicious Food Show in Toronto put on by the Food Network with my beloved friend Jen. I've been attending these shows more often not only because they feature ample amounts of deliciousness but also because it combines two of my loves: food and event planning (which I went to school for).

The show's goal was to showcase the "Best in Cooking, Food & Kitchens" and I truly felt that it delivered on that part. I quickly learned after having gone through the first aisle that us food bloggers were VERY easy to spot. We were the ones with ridiculous cameras around our necks, trying to balance multiple pamphlets while taking photos of everything that caught our eyes and still trying to play off that we weren't going to rush home and recount all of our thoughts to our audience. I had about 6 or 7 booths ask if I was a food blogger and at first I was shy about it but by the end, I was darn proud of it. I love blogging and it's become such a phenomenon that I can't deny it's a huge part of who I am.
Caramel Apple Pie & Skor Cupcakes from Cupcake Diner
I found it very interesting that the show had a few food trucks actually inside the show. Toronto still hasn't quite caught on to the food truck revolution the way other major cities have (especially in the US) but it's nice to see that they're slowly making their way north of the border. I sampled a cupcake from the Cupcake Diner (Skor, I believe) as well as a delicious soft serve ice cream cone that tasted like creamsicles (and had a very dreamy driver to boot! HA! Double delicious!). There were so many neat things to see that it was very hard to avoid going into sensory overload but I had a great time.

However, while we were there, we stopped at a booth that was fantastic on so many levels: Bobbette & Belle. Allyson & Sarah, who own the business, are the most lovely people ever! Not only do they have amazing looking artisan pastries and confections but after chatting with them for a few minutes, you really can't help but want to be best friends with them and take them home with you! Naturally, I had been holding out on buying macarons at the show but I caved with Bobbette & Belle's and I wasn't disappointed. I bought some pistachio ones (surprised are you?) as well as milk chocolate caramel ones and they were superb! Check out some of their creations:
 Here are some other photos from the show as well:

If this show happens again (which I'm sure it will), I highly recommend that you grab some comfy walking shoes and go! It was well worth it!

Happy Sunday!

t

Sunday, November 6, 2011

Macarons : versions 1 and 2 and a book review too!

How long has it been that that I've been going on and on about my love of macarons? Weeks? Months? Regardless, I decided that this past week was really time to do it! I've been attending a few of food shows in Toronto over the last little while as well as having discovered a local bakery that makes macarons and frankly, I was getting tired of paying disgusting amounts of money for them.

Thus far, I am in LOVE with pistachio macarons - this is why you have all been subjected to photos of pistachio paste and the like. Well I am proud to say that it is finally happened... Macarons have been born in my very own kitchen from my very own hands... TWICE this week! Allow me to explain.

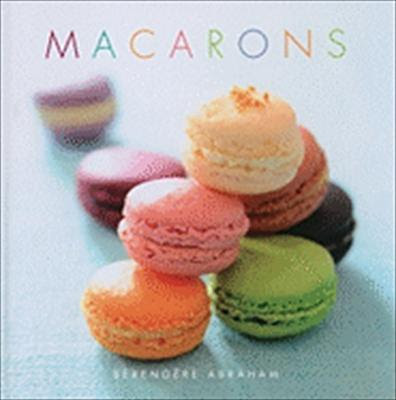
Earlier this week I decided that I was going to finally do it. So I whipped out the lovely book that I bought a few weeks ago entitled Macarons by Bérengère Abraham:

Photo Credit: Better World Books
I got this book at a great price and was glad that it had a recipe for pistachio macarons so I gave them a try. Keep in mind, this recipe calls for the egg whites to be refrigerated for 24 hours prior to being whipped, plus the macarons need to sit (once piped) for an hour and pretty much burped and swaddled while I'm at it! As my darling pastry chef on retainer, Sophie, claimed "this recipe has come from the ancient archives of Le Cordon Bleu...." - a place where recipes never come out ever again except in this book.  I followed the recipe to a T!!!! and this is what I ended up with:
 Yup... we ended up with lovely little green martian clouds. Granted DELICIOUS ones... but nonetheless, these look NOTHING like what is on the cover of the book (see above!). I was crushed...heartbroken and defeated. Poor Sophie was constantly being texted with updates and the messages of sadness... She vowed to give me her recipe on our next visit so that I could try again. While I accepted this gracious offer, I wasn't quite ready to give up just yet! That being said, I'm not even willing to show you process pictures of how these disasters were made! I feel that pathetic about them!

This morning I did some wonderful scoping of Youtube videos and came across a video tutorial from Fine Cooking Magazine on how to make the perfect French macaron. I watched the video featuring chef Joanne Chang and instantly knew I'd found the recipe that would bring me success. Watching her in the video helps IMMENSELY and I recommend that everyone watch it! Chef Joanne has saved my (macaron) life!

I didn't take process photos for fear that today's batch was failure round 2... thankfully it wasn't. Welcome to the world my wonderful little macarons!

Prior to baking - crusted over and ready for the oven

I LOVE YOU MACARONS!
I will admit that they could have had a little more strong colour and have been a little less cooked but I don't even care! There is absolutely no comparison to my previous martian clouds to these bits of heavenly goodness... I mean really!
See?
Now, back to my book review.... this book did provide me with one valuable recipe: the pistachio cream filling. HOWEVER while the filling is AMAZING and I would most likely make it again, it is tiresome and grueling to say the least. Watch the process here:
Step 1 - Boil Pistachios

Post-boiling... peeling of skin has begun

Mmmmm - pistachio skin

Pretty peeled pistachios

Then dry roast peeled pistachios

Then boil sugar and water

Then add pistachios and stir until awkward looking

Then pulse to oblivion in food processor until crumbs form. Add in 1 egg white...

Voila! Pistachio paste... which will be added to other ingredients to make pistachio cream (and you thought we were done!)

Add pistachio paste to 35% cream and cook until disgustingly hot

Add a couple of other things and voila! Now you're done... kinda. Put it in the fridge to cool.
This delightful filling is simply piped between two cookies and then they're sandwiched together. Without any further delay, here they are in all of their beautiful and artistic glory!


This is what happens when you peel the macarons off the parchment paper a little too early


I am in love... and on that note. Good night :)

Sleep sweet and eat sweet!

t

Wednesday, October 26, 2011

Mushroom Turnovers & a Busy Weekend

I truly can't believe how quickly this past weekend flew by. I look forward to being able to just relax and veg for a bit and unfortunately this was not one of those weekends. However, it was full of adventures all around that made it all worth it.

Friday night was spent with my baby brother, Jordan, who will very politely and proudly tell you that he is "5 and three quarter years old". We had a sibling sleepover which was full of mac'n'cheese (Mrs. K's recipe) and movies and snuggles all around. Honestly, how cute is he!!??!?
Then, on Saturday morning we headed to Andrew's Scenic Acres to pick out some pumpkins. I learned the hard way that when going to get pumpkins at the patch, bring more than on adult because almost 6 year old children do NOT like to help carry pumpkins. That being said, we did have quite the adventure :)


After our patch adventure, there was some serious pumpkin carving (photos to follow) and then I headed off to the Delicious Food Show at the Better Living Centre in Toronto. I promise there will be an entire post about it within the next few days.

On Sunday, our family got together to remember my Grandfather (my Dido) since it's been a year since he passed away.
Baba, Dido and I in early 1989
We had a lovely lunch together and I whipped up some mushroom turnovers to bring over to Baba's house. I'm sorry to say that I didn't take any process pictures but the end result was delightful.

Here's the quick rundown of how I made them.
  • Bring your puff pastry to room temperature (frozen puff pastry makes this RIDICULOUSLY hard to say the least). 
  • Slice 1 pint of mushrooms
  • Melt 1 tbsp of oil and 1 tbsp of butter in a saute pan and add 1 small onion and 1 clove of finely chopped garlic. Cook on medium heat until softened. Add 1 tsp of fresh thyme leaves. 
  • Stir in 3 tbsp of marsala wine and 1 tsp of maple syrup. 
  • Add the sliced mushrooms and 1/4 tsp of salt. Saute until the mushrooms are soft and cooked through. 
  • Stir in 3 tbsp of heavy (35%) cream and cook until a thick sauce is made. 
  • Roll out your puff pastry into a 9 x 13 rectangle. Cut the rectangle into 12 square-ish rectangles. 
  • Add one spoonful of filling to the middle and fold the square in half and pinch the edges. 
  • Place on a baking sheet and brush with a beaten egg. 
  • Bake at 400F for 15-20 minutes or until golden brown. 
Ta-Da!
 

Look at the delicious layers of pastry!
I hope you all enjoyed your weekend and that it was slightly more relaxed than mine.

Happy cooking!

t